Before we learn how to make this work in Illustrator, let’s take a look at two other Adobe applications – Photoshop and InDesign. Why? Because interestingly enough, they both have something that Illustrator doesn’t have.
Photoshop has two opacity settings: Layer Opacity, which applies to the entire layer, including its layer effects; and Fill Opacity, which applies only to the pixels that are drawn in the layer, and not its layer effects.

In our example, if we wanted to create an object that had a transparent fill and a drop shadow, we’d first apply a drop shadow layer effect. But we wouldn’t want to reduce the Layer Opacity, because that would lower the opacity of the drop shadow along with the art itself. Instead, we’d adjust the Fill Opacity, which will allow the just the art to be transparent, leaving the drop shadow at full strength.
But notice that the drop shadow isn’t visible through the art of the object itself. It’s as if the artwork “knocks out” the drop shadow beneath it. How did that happen? The answer lies within the Drop Shadow section of the Layer Styles dialog box. There you’ll find a checkbox marked “Layer Knocks Out Drop Shadow”, which is turned on by default.

If you head over to InDesign, you’ll find a similar option in the Drop Shadow section of the Effects dialog box as well. There, a setting called “Object Knocks Out Shadow”, also on by default, helps designers keep drop shadows from being seen through objects with transparency settings such as opacity or blend modes.

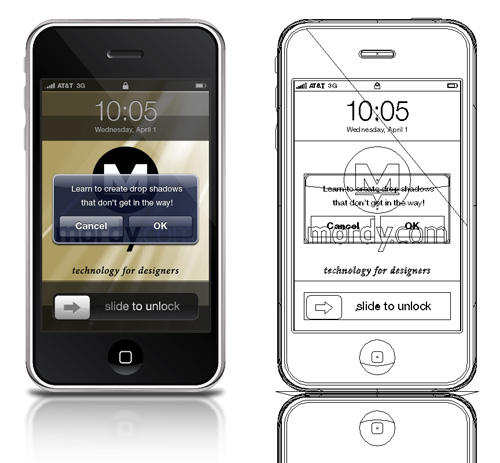
Now let’s come full circle back to Illustrator, where the Drop Shadow dialog box (found in the Effects > Stylize menu) has no setting to instruct Illustrator to knock out the effect, and we’ll create the iPhone dialog step by step.*
1. Use the Rectangle tool to draw a shape. If you’d like, choose Effect > Stylize > Round Corners to round the corners of the rectangle.
2. Fill the rectangle with a dark blue color and choose a light blue color for the stroke.
3. Choose Window > Appearance to open the Appearance panel (and shame on you if the panel wasn’t already open). Target the dark blue fill and change its opacity to 80%.

4. Click on the word “Path” at the top of the Appearance panel to target the entire object.
5. Choose Effect > Stylize > Drop Shadow, and apply your desired drop shadow settings. At this point, you’ll be able to see the drop shadow through the fill of the object. But we’ll fix that next.
6. With the object still selected, open the Transparency panel and expand it so that all of its options are visible. Check the box marked Knockout Group (you may need to click twice to get a check mark in the box).

If you want to know WHY the Knockout Group setting effectively clipped the drop shadow, you can read my explanation in this post, where I used a similar technique to simulate stitched lines for apparel designers.
I should point out that when I asked Adobe why Illustrator didn't have a check box in the Drop Shadow dialog box that would clip an object's shadow, I got an interesting response: "the real world doesn't really work that way". I can't argue with that logic. If you think about it, if an object were semi transparent, it would likely still be dense enough to cast a shadow beneath it. I'll have to pose the question to the folks over at Apple who designed the interface I guess.
One final note: the Object Knocks Out Shadow found in InDesign will only work when your entire object has an opacity setting applied to it. However, if you try to simulate this exact effect in InDesign, where you apply an opacity value just to the fill of an object, you’ll have to use the same technique as we used in Illustrator – you’ll have to turn on the Knockout Group option for that object.
*OK, so in the final version of the iPhone alert dialog, I had to do a little adjusting. Turns out that the opaque stroke that appears around the perimeter of the dialog is actually filled with a gradient. Alas, gradients can’t be applied to a stroke in Illustrator. I had to create a separate compound path in order to apply the gradient.